

Flutter Basics: Flexible widgets
A detailed visual guide covering the basics of Flexible, Expanded and Spacer widgets in Flutter.


In flutter, widgets are often placed inside rows or columns to decide their layout on the screen.
By default, the widgets inside the row or column is placed next to each other but that can be controlled by setting the mainAxisAlignment property to spaceAround, spaceBetween, or spaceEvenly.
However if we want that some widget(s) inside a row or column should fill up all the available space, we can use the built-in flexible widgets. Flexible widgets in flutter allows us to decide how the widgets will be spaced out or how much space on the screen they should occupy.
Flutter has 3 flexible widgets:
- Flexible
- Expanded
- Spacer
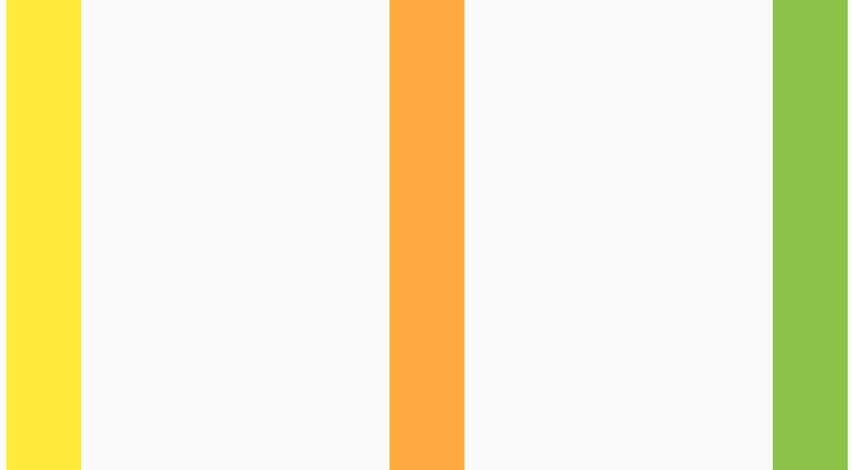
Let us first see how the widgets are arranged inside a row by default.
Here we are creating 3 containers inside a row and by default, they will get placed next to each other.

This is how the containers will look like on the screen with the above code. As we can see, the three containers are placed next to each other.

If we want the widgets to be spaced out evenly, we can mention the following inside the Row definition.
mainAxisAlignment: MainAxisAlignment.spaceEvenly
And that will spread out the widgets on the screen.
However if we want some of these widgets to take up the remaining space on the screen, we can wrap our widget inside any of the flexible widgets.
1. Flexible
Use Flexible for resizing your widgets in rows and columns.
You can use it to adjust how much space different child widgets take up relative to their parent widgets.
We use the keyword flex to indicate how much space we want the current widget to occupy on screen
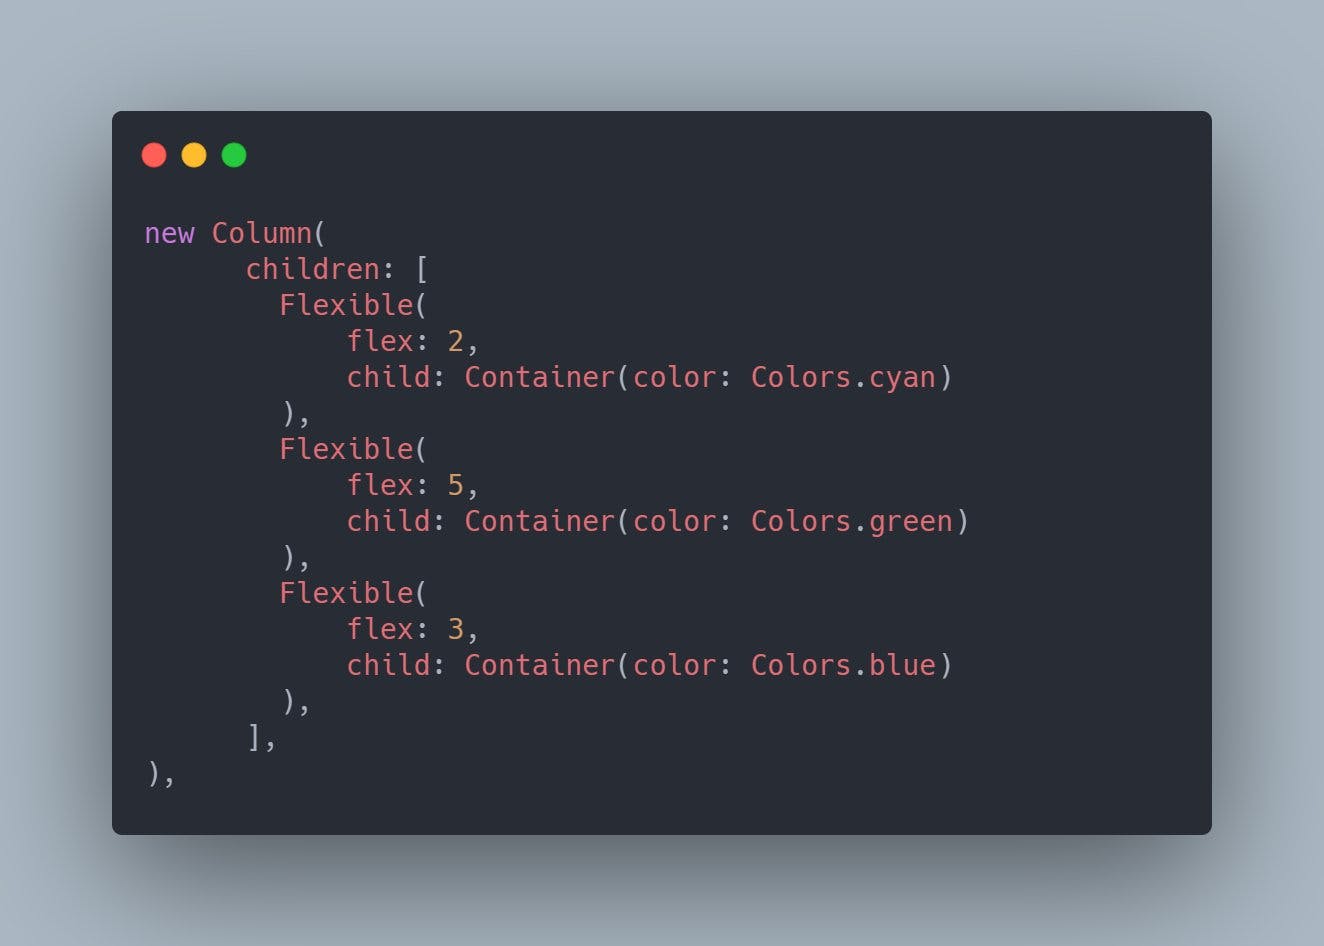
With the above code, we are dividing the screen into 3 parts:
- 2/10 = 20% of screen
- 5/10 = 50% of the screen
- 3/10 = 30% of the screen
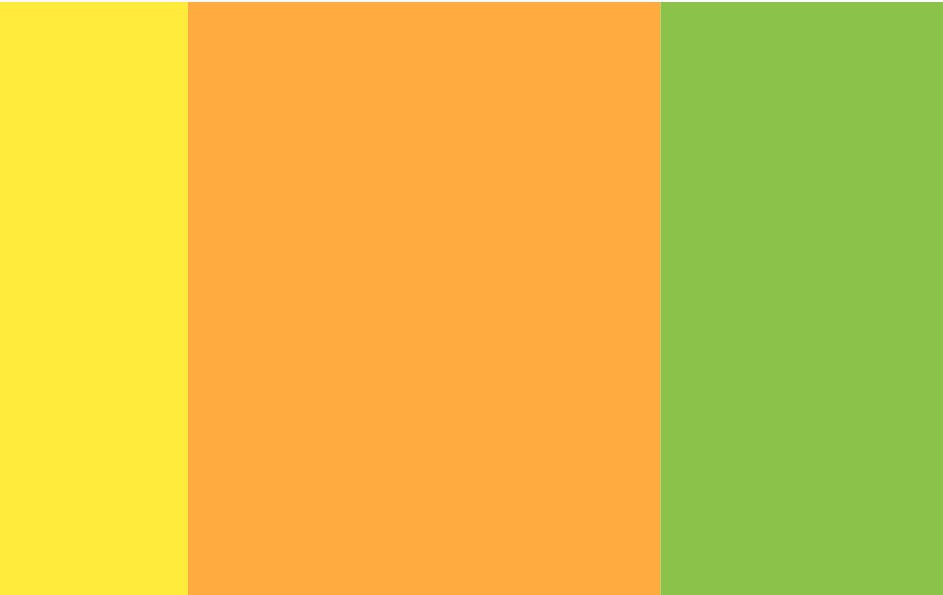
Here's how our screen looks right now.

To do the same vertically, flex can be applied to a row instead of a column.
Here's how the screen gets divided when flex is applied inside a row.
More information about the flexible widget can be found here: api.flutter.dev/flutter/widgets/Flexible-cl..
2. Expanded
Another flexible widget that we can use to spread out our child widget is Expanded.
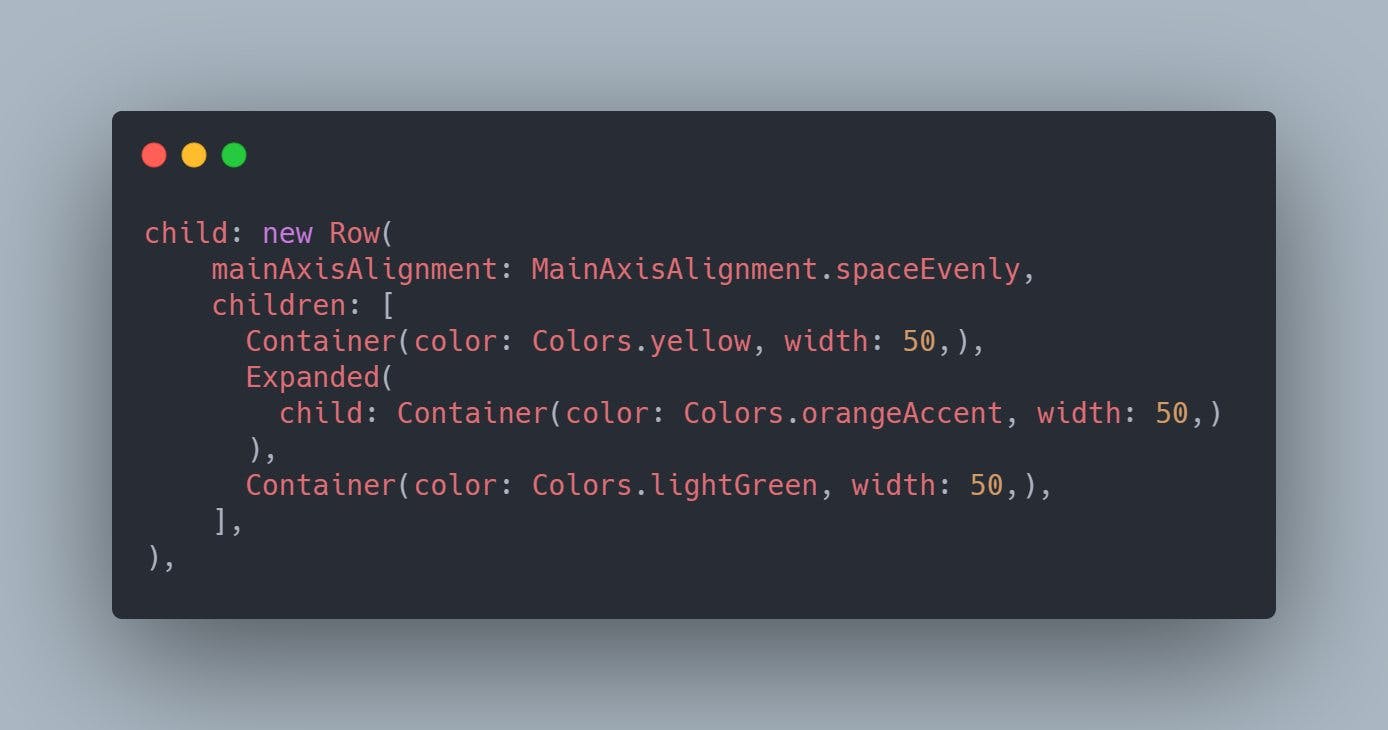
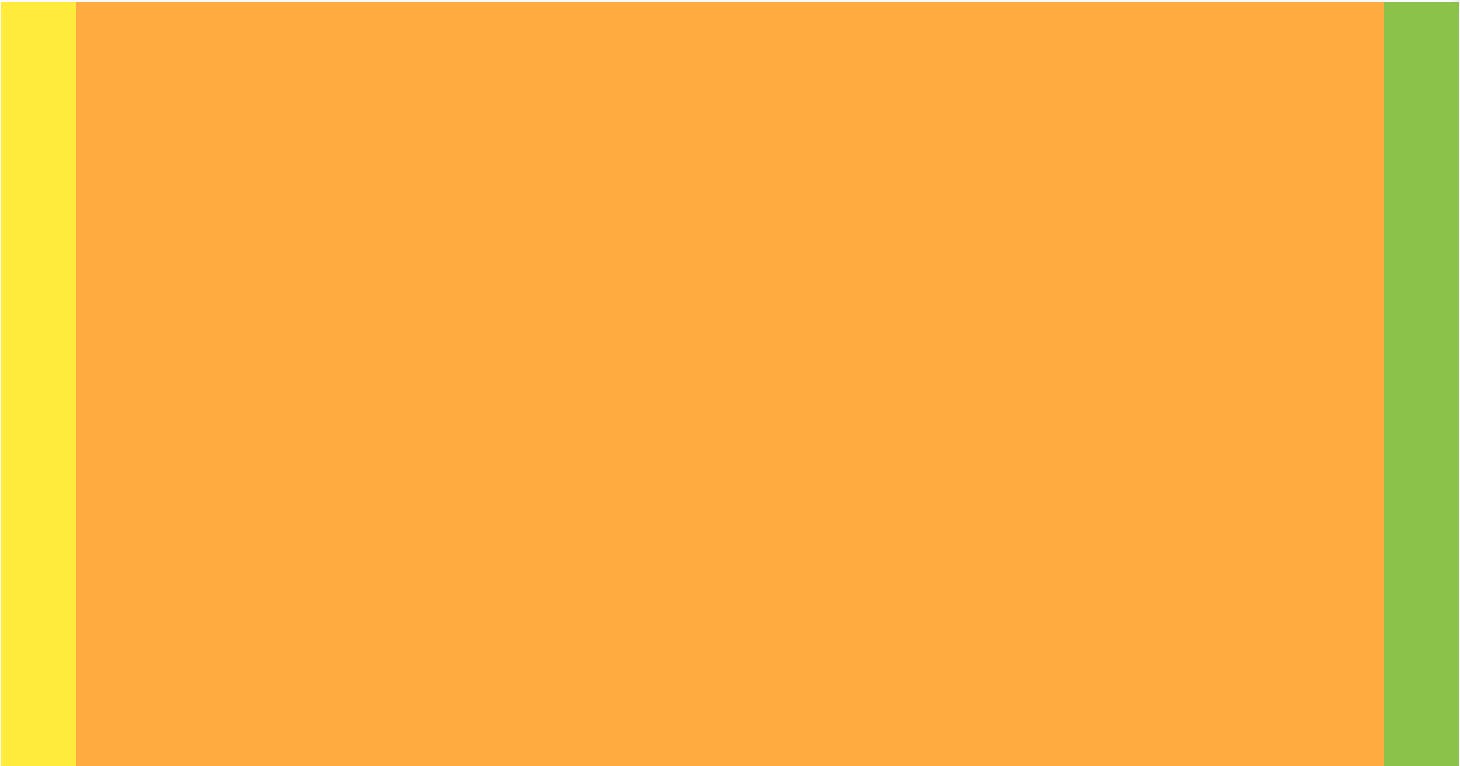
Here's how our screen will look like now.
As the orange container has been wrapped in Expanded, it has taken up all the space on the screen.
We can have multiple widgets wrapped inside Expanded, and by default each of them is given equal weightage, meaning each of them will occupy the same space on screen.
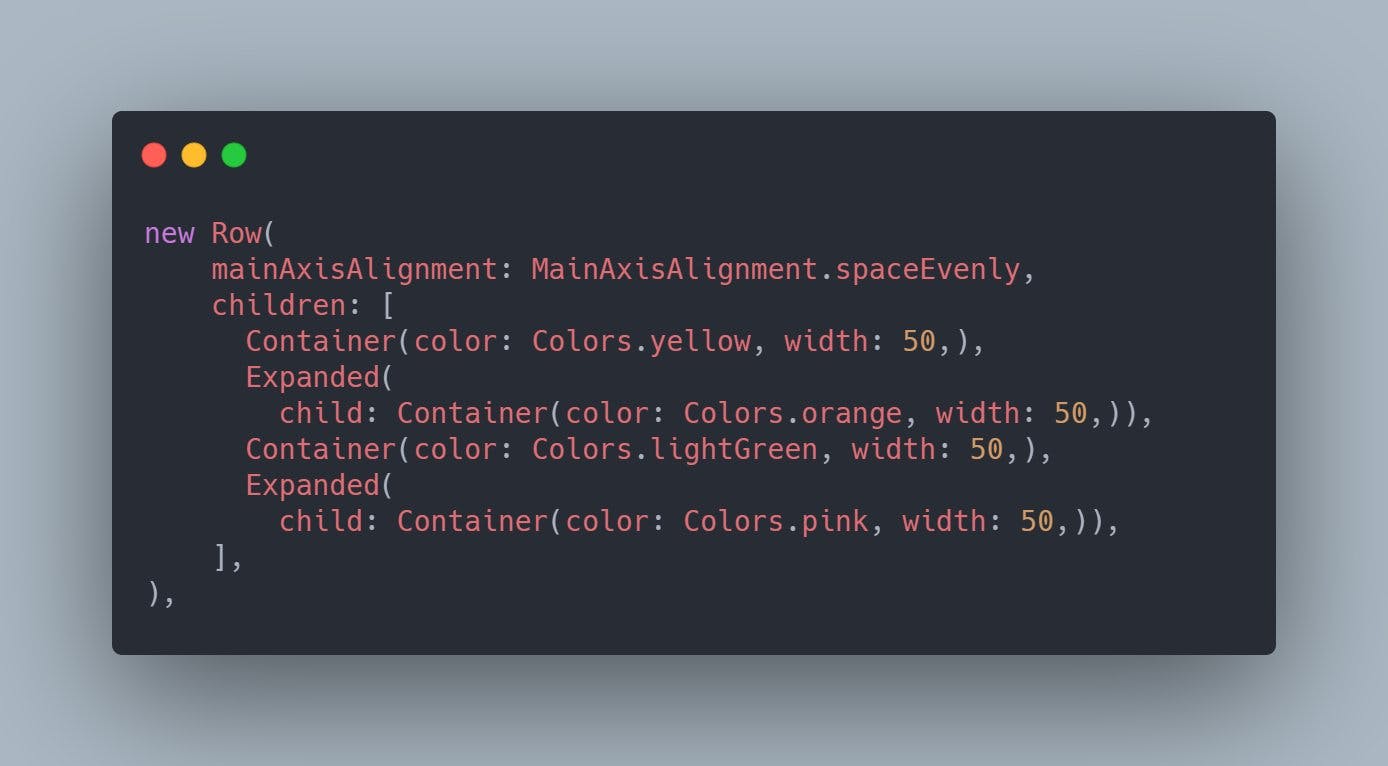
And this is how the screen will look like. As we have 2 widgets inside Expanded now, both of them took up equal amount of the remaining space on screen.

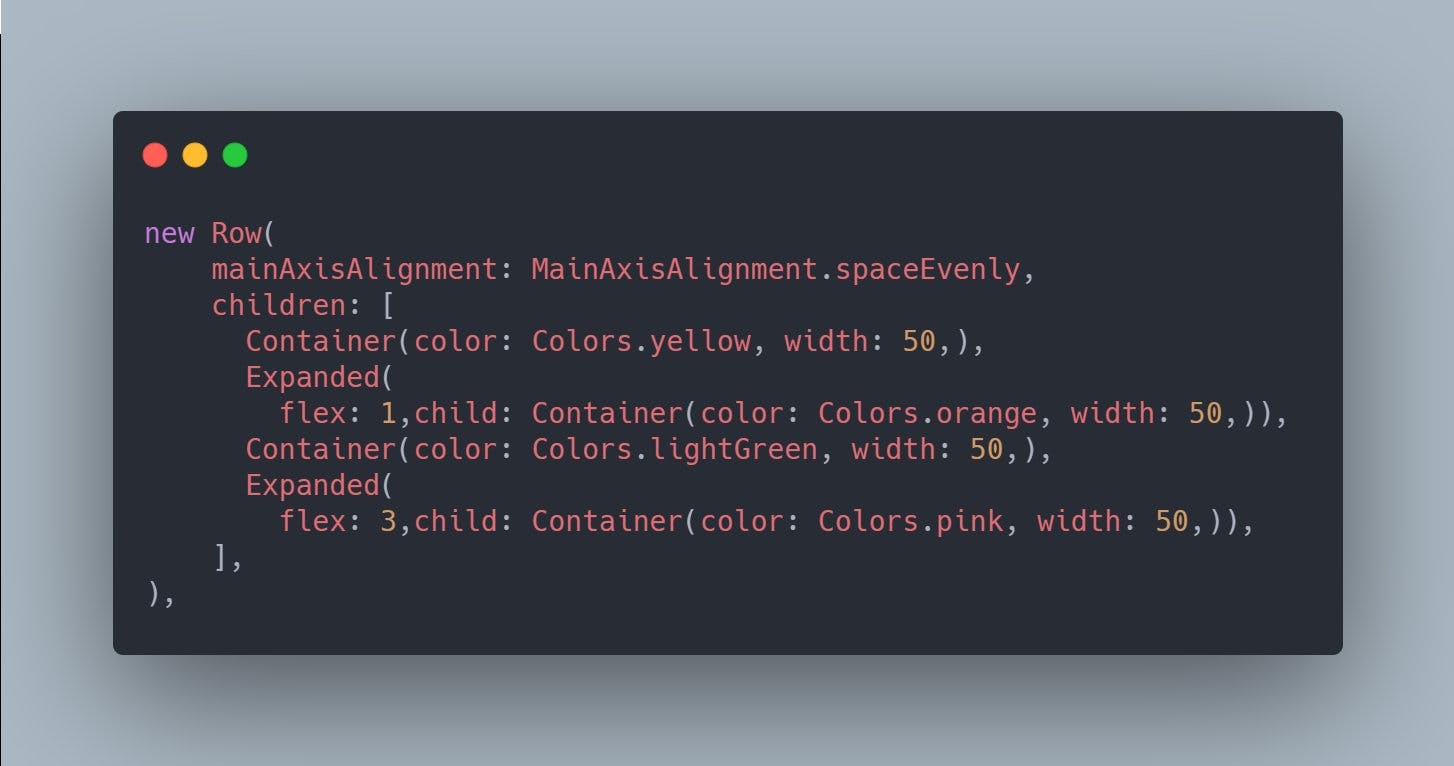
If we want that the multiple expanded widgets should occupy space in different ratio/proportion, we can use the optional parameter flex to prioritize which widget will occupy more space on the screen.
And this is now our screen looks like.
 Since the pink container has a flex of 3, it occupies 3 times the space compared to the orange container which has a flex of 1.
The yellow and green container size however is constant since they are not wrapped inside any flexible widgets.
More information and examples about the Expanded widget can be found here: api.flutter.dev/flutter/widgets/Expanded-cl..
3. Spacer
The Spacer widget will take up any available space.
Setting the Flex.mainAxisAlignment on a flex container that contains a Spacer to spaceAround, spaceBetween, or spaceEvenly will not have any visible effect.
Spacer is mostly used inside a row or column.
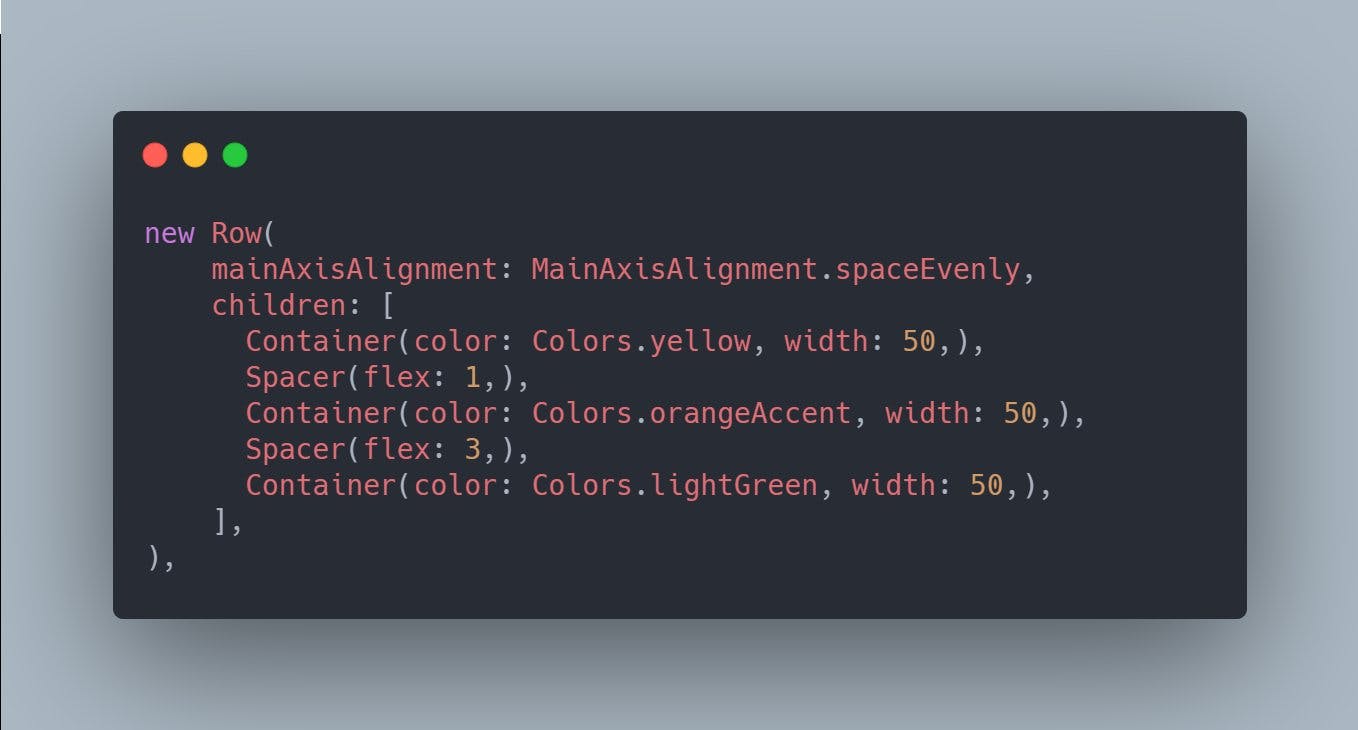
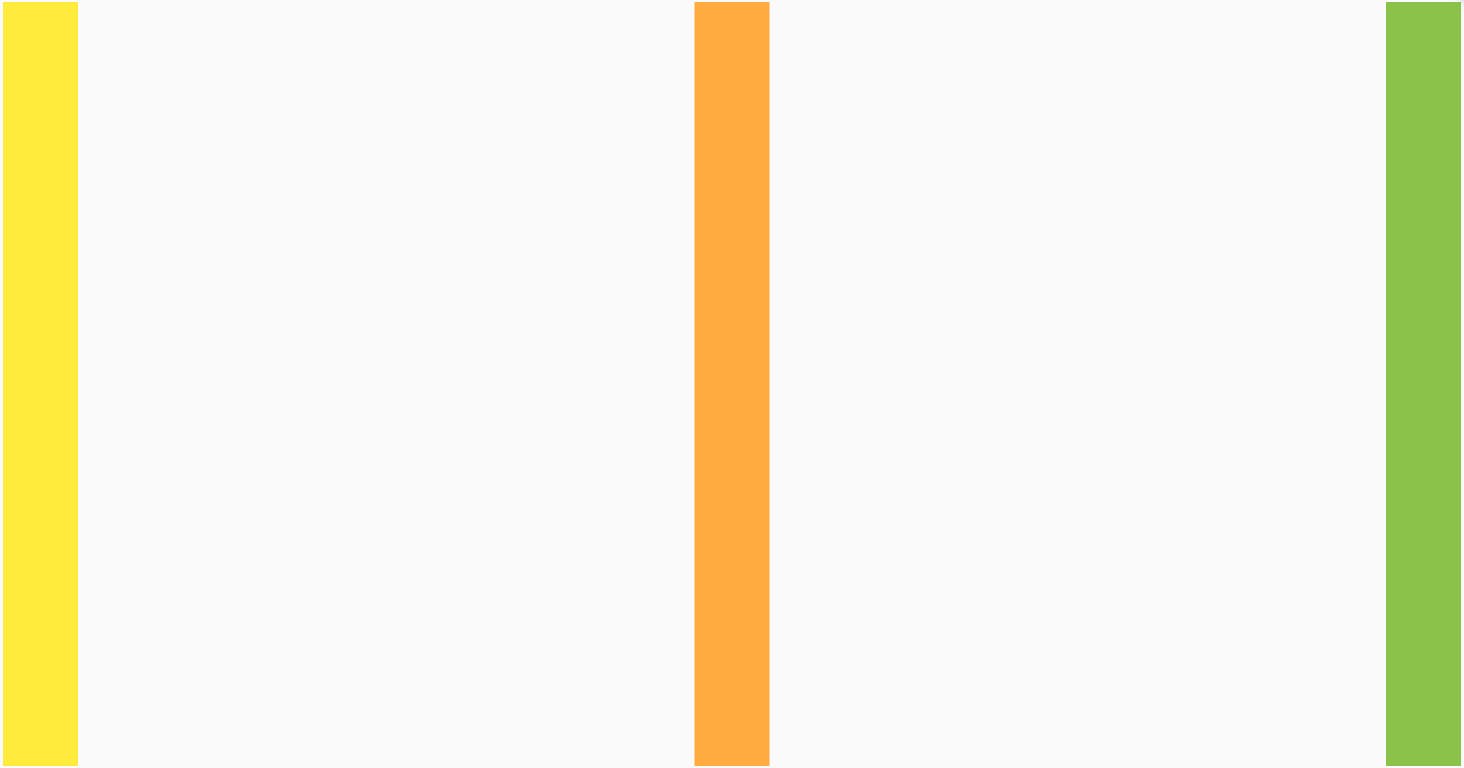
This is how the screen now looks like.
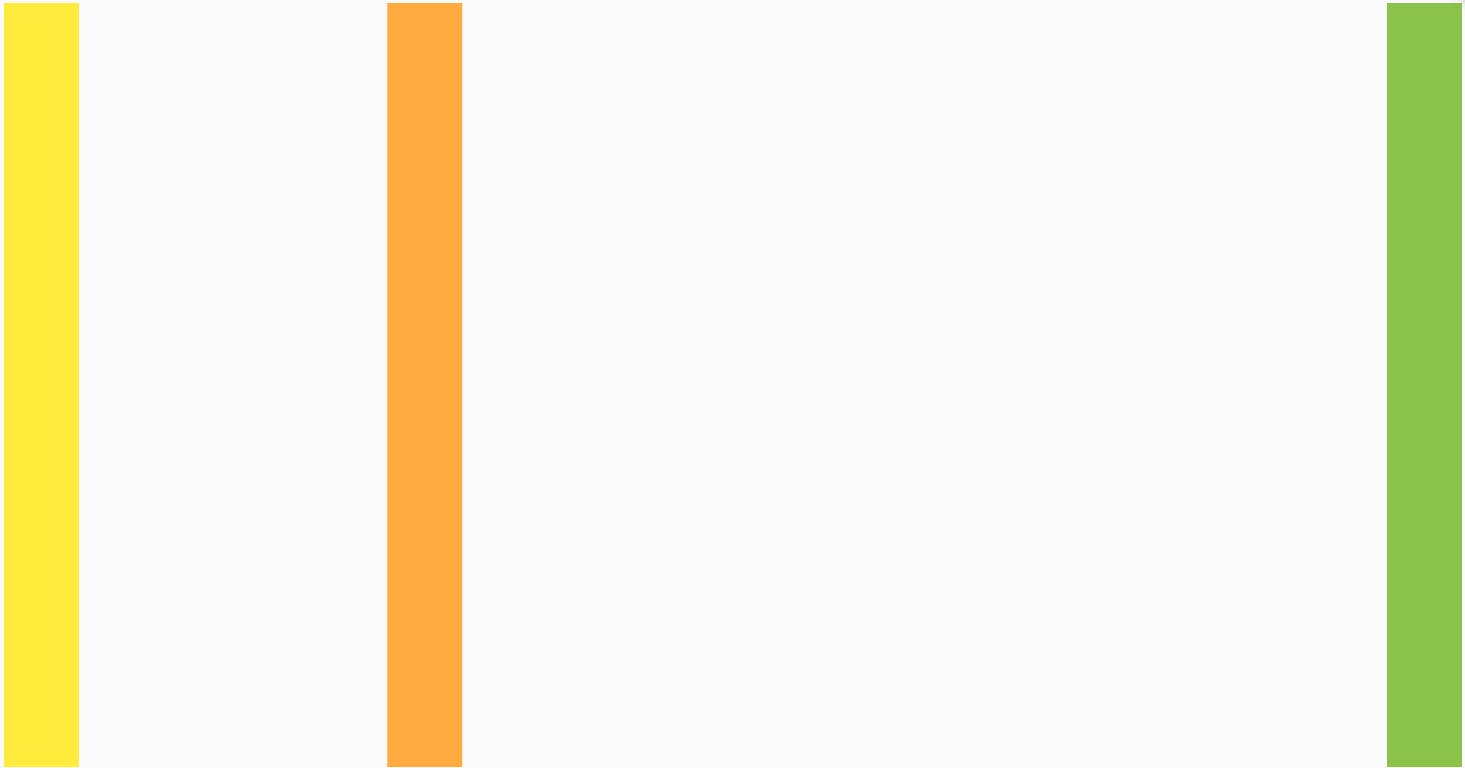
As we can see, the space between orange and green is 3 times the space between yellow and orange
This difference occurred due to the flex value. If flex value is not provided, it defaults to 1 which means widgets will be spaced out evenly
So we can see that the Spacer can be used to manipulate the amount of space between widgets while Flexible & Expanded can be used to manipulate the amount of space a widget occupies on the screen.
More information and examples on the Spacer class can be found here: api.flutter.dev/flutter/widgets/Spacer-clas..
That's it for now.
Hope you guys learnt something useful about flutter. Looking forward to feedback and suggestions.
Cheers. Happy Coding 🥂